Set IP Restrictions
Overview
QueryPie offers IP band access control policies that can be implemented during the system authentication phase.
Set Up IP Access Control
You need to control IPs to ensure that only authorized users on your internal network can access the QueryPie web console. In the QueryPie Web IP Access Control section, you can configure the IPs allowed for all users accessing the QueryPie web console, as well as set IP control policies for individual users.
If the IP you enter does not match the IP of the administrator who set the option, even if you are an administrator, you will be logged out immediately after saving, so please proceed with caution.
IP Control for All Users
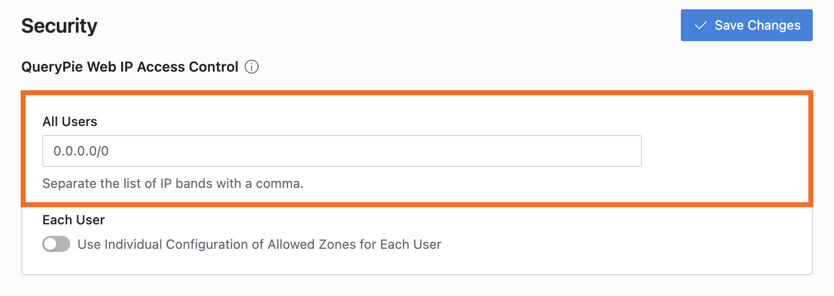
Settings > General Settings > Company Management > Security
From the General Settings menu, navigate to the Company Management > Security menu.
Specify the IPs to allow access for all users accessing the QueryPie web console at QueryPie Web IP Access Control > All Users.
The default is set to 0.0.0.0/0, allowing access from all IP addresses.
You can specify multiple IP bands by separating them with commas ( , ).
Click
Save Changesin the upper-right corner to apply the modifications.
Control IP for Individual Users
To utilize this feature, ensure that its availability is set to Enabled.
1. Enabling individual user IP control
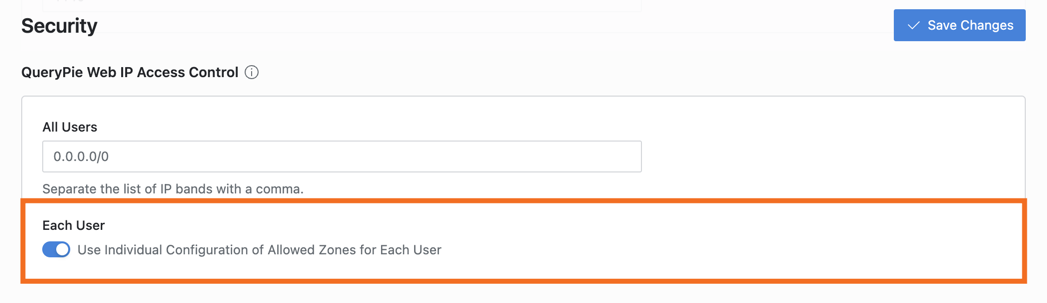
Settings > General Settings > Company Management > Security
From the General Settings menu, navigate to the Company Management > Security menu.
Switch the QueryPie Web IP Access Control > Each User setting option to the On state. You can now configure the specific IPs you wish to allow for individual users.
2. Set IPs to allow for individual users
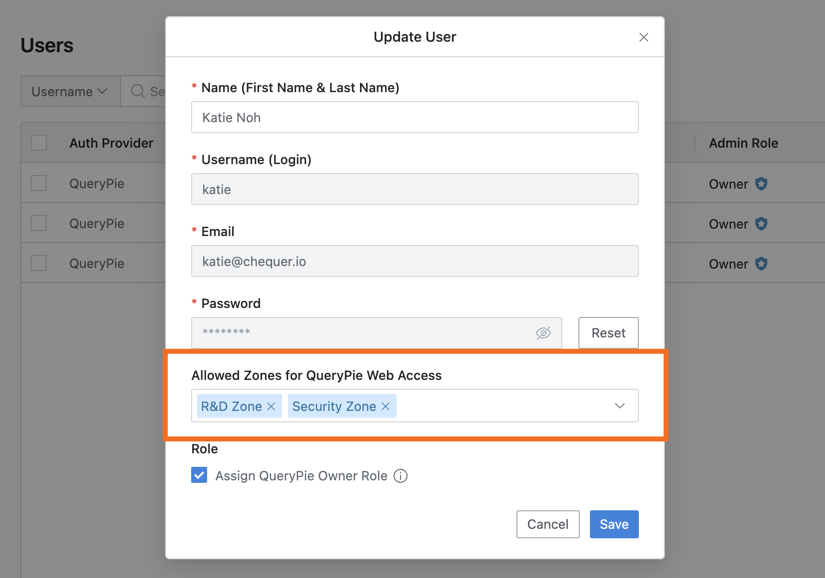
Settings > General Settings > User Management > Users > Update User
From the General Settings menu, navigate to the User Management > Users menu.
Select the desired user from the Users list to access the Update User popup.
In the Allowed Zones for QueryPie Web Access setting, select the Allowed Zones that you wish to grant access to the QueryPie web console. You can select multiple Allowed Zones.
Please note that this feature is only accessible on the Edit User screen (Update User), not on the Create User screen (Add User).
Click the
Saveto save.
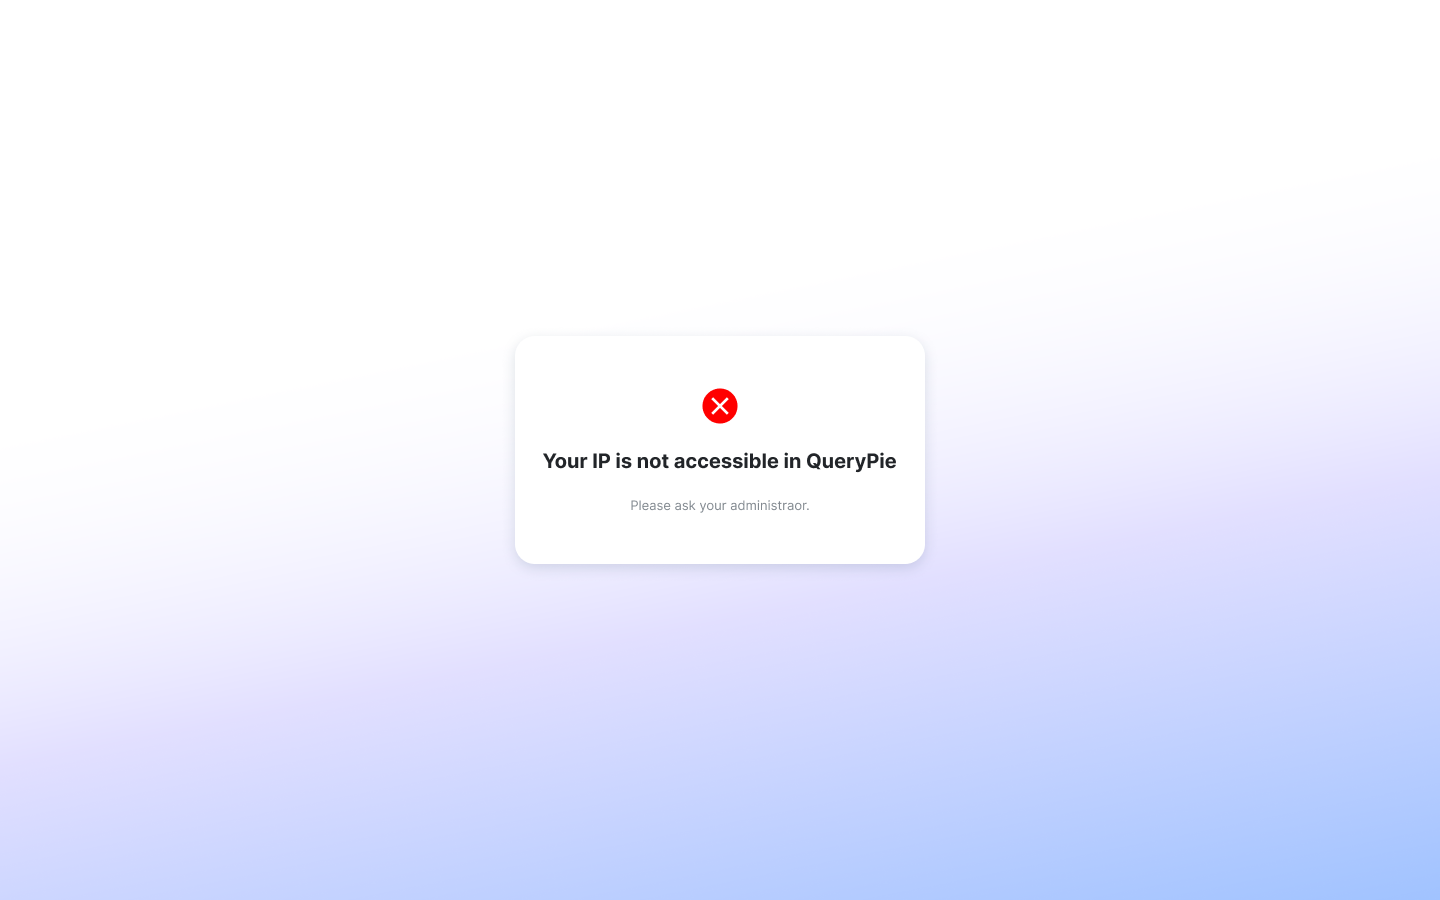
Q. What screen will appear if a user tries to access the QueryPie web console from an unauthorized IP?
A. If attempting to access from an unauthorized IP, users will be unable to access any page within the QueryPie web console and will encounter the following prompt. In scenarios where the default value (0.0.0.0/0) is registered for All Users and individual users have specific Allowed Zones set, they may access the login page but will not be able to log in.
Doesn't match the IP registered in Security > QueryPie Web Access Control > All Users

Doesn't match the Allowed Zone registered in Users > Update User
Related Topics