Okta Integration
QueryPie supports Okta integration, allowing you to synchronize users and groups from Okta to grant access and enforce policies. This integration provides a streamlined and convenient experience for your users while maintaining strict security policies. By integrating with Okta, QueryPie enhances the security, operational efficiency, and user experience of your databases and systems management ecosystem.
Add QueryPie as an Application in Okta
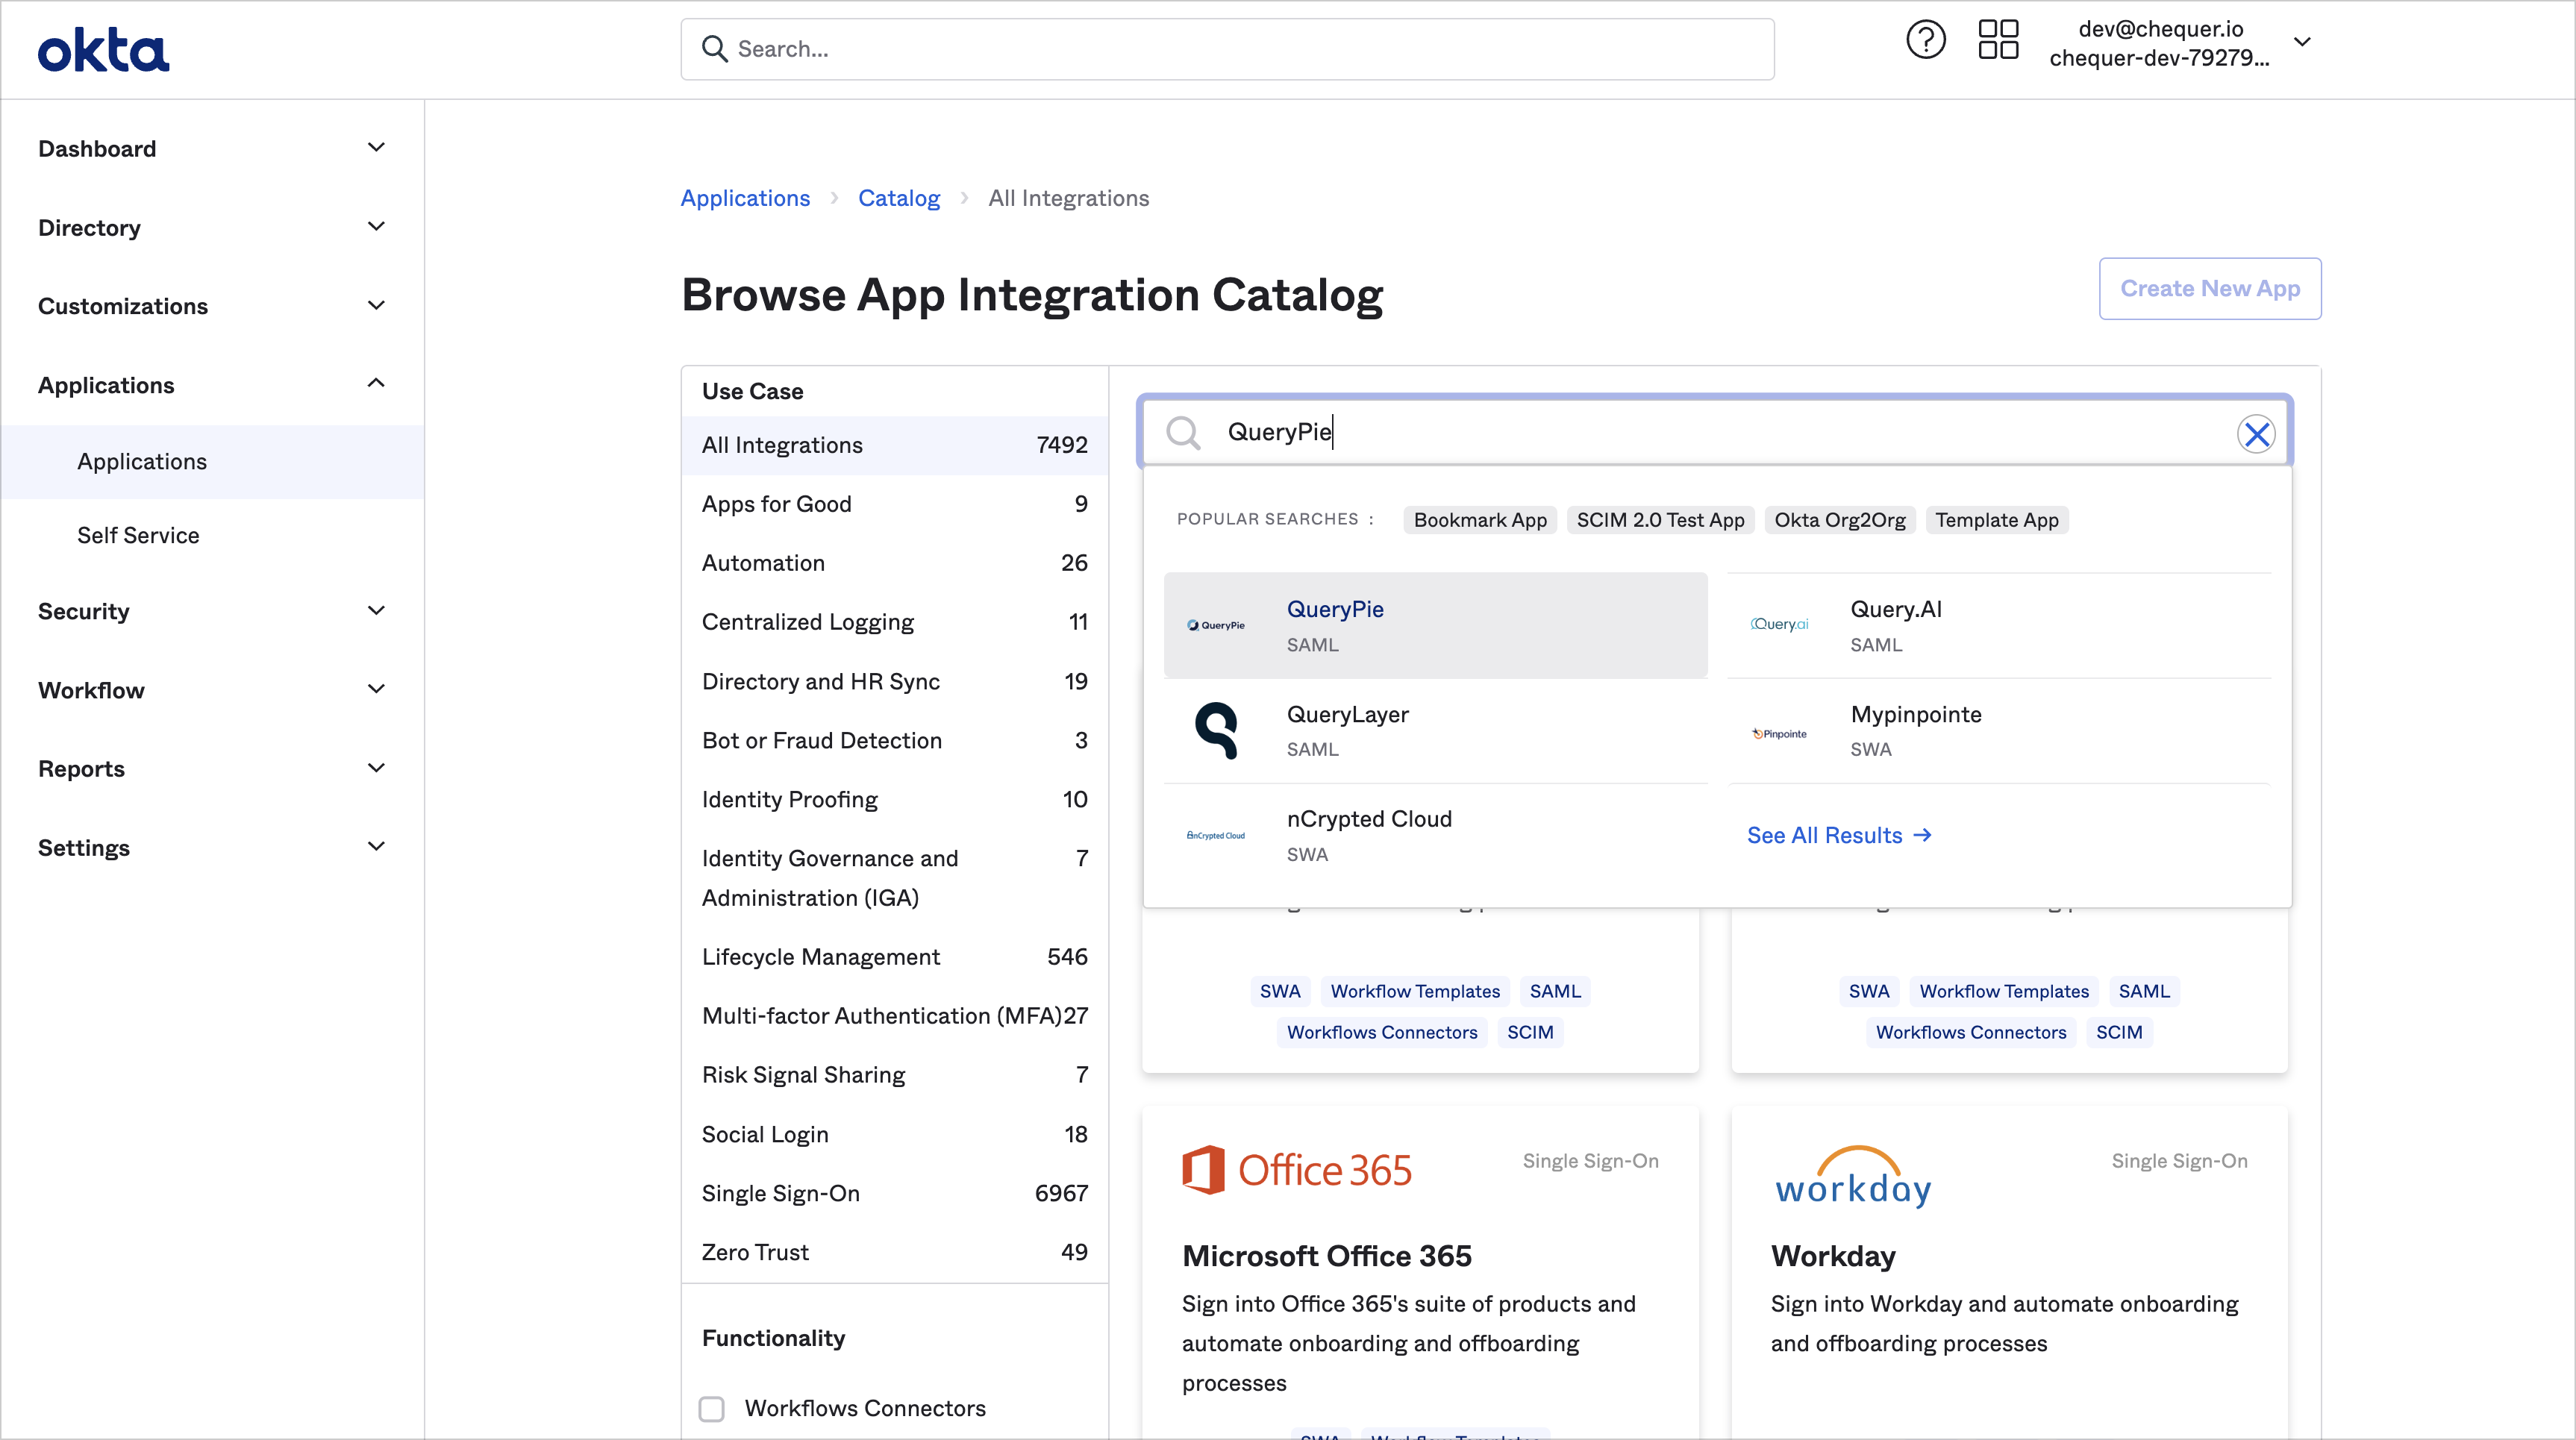
Okta Admin Console > Applications > Applications > Browse App Catalog > QueryPie Search
Access the Okta admin console after signing in with an admin account.
On the Okta admin page, in the left pane, go to Applications > Applications menu.
Click the
Browse App Catalogbutton and search for QueryPie.Select the QueryPie application catalog and click the
Add Integrationbutton.After confirming that the Application Label is entered as QueryPie, click the
Donebutton to add the application.
Set Up a Profile Editor
Okta Admin Console > Directory > Profile Editor
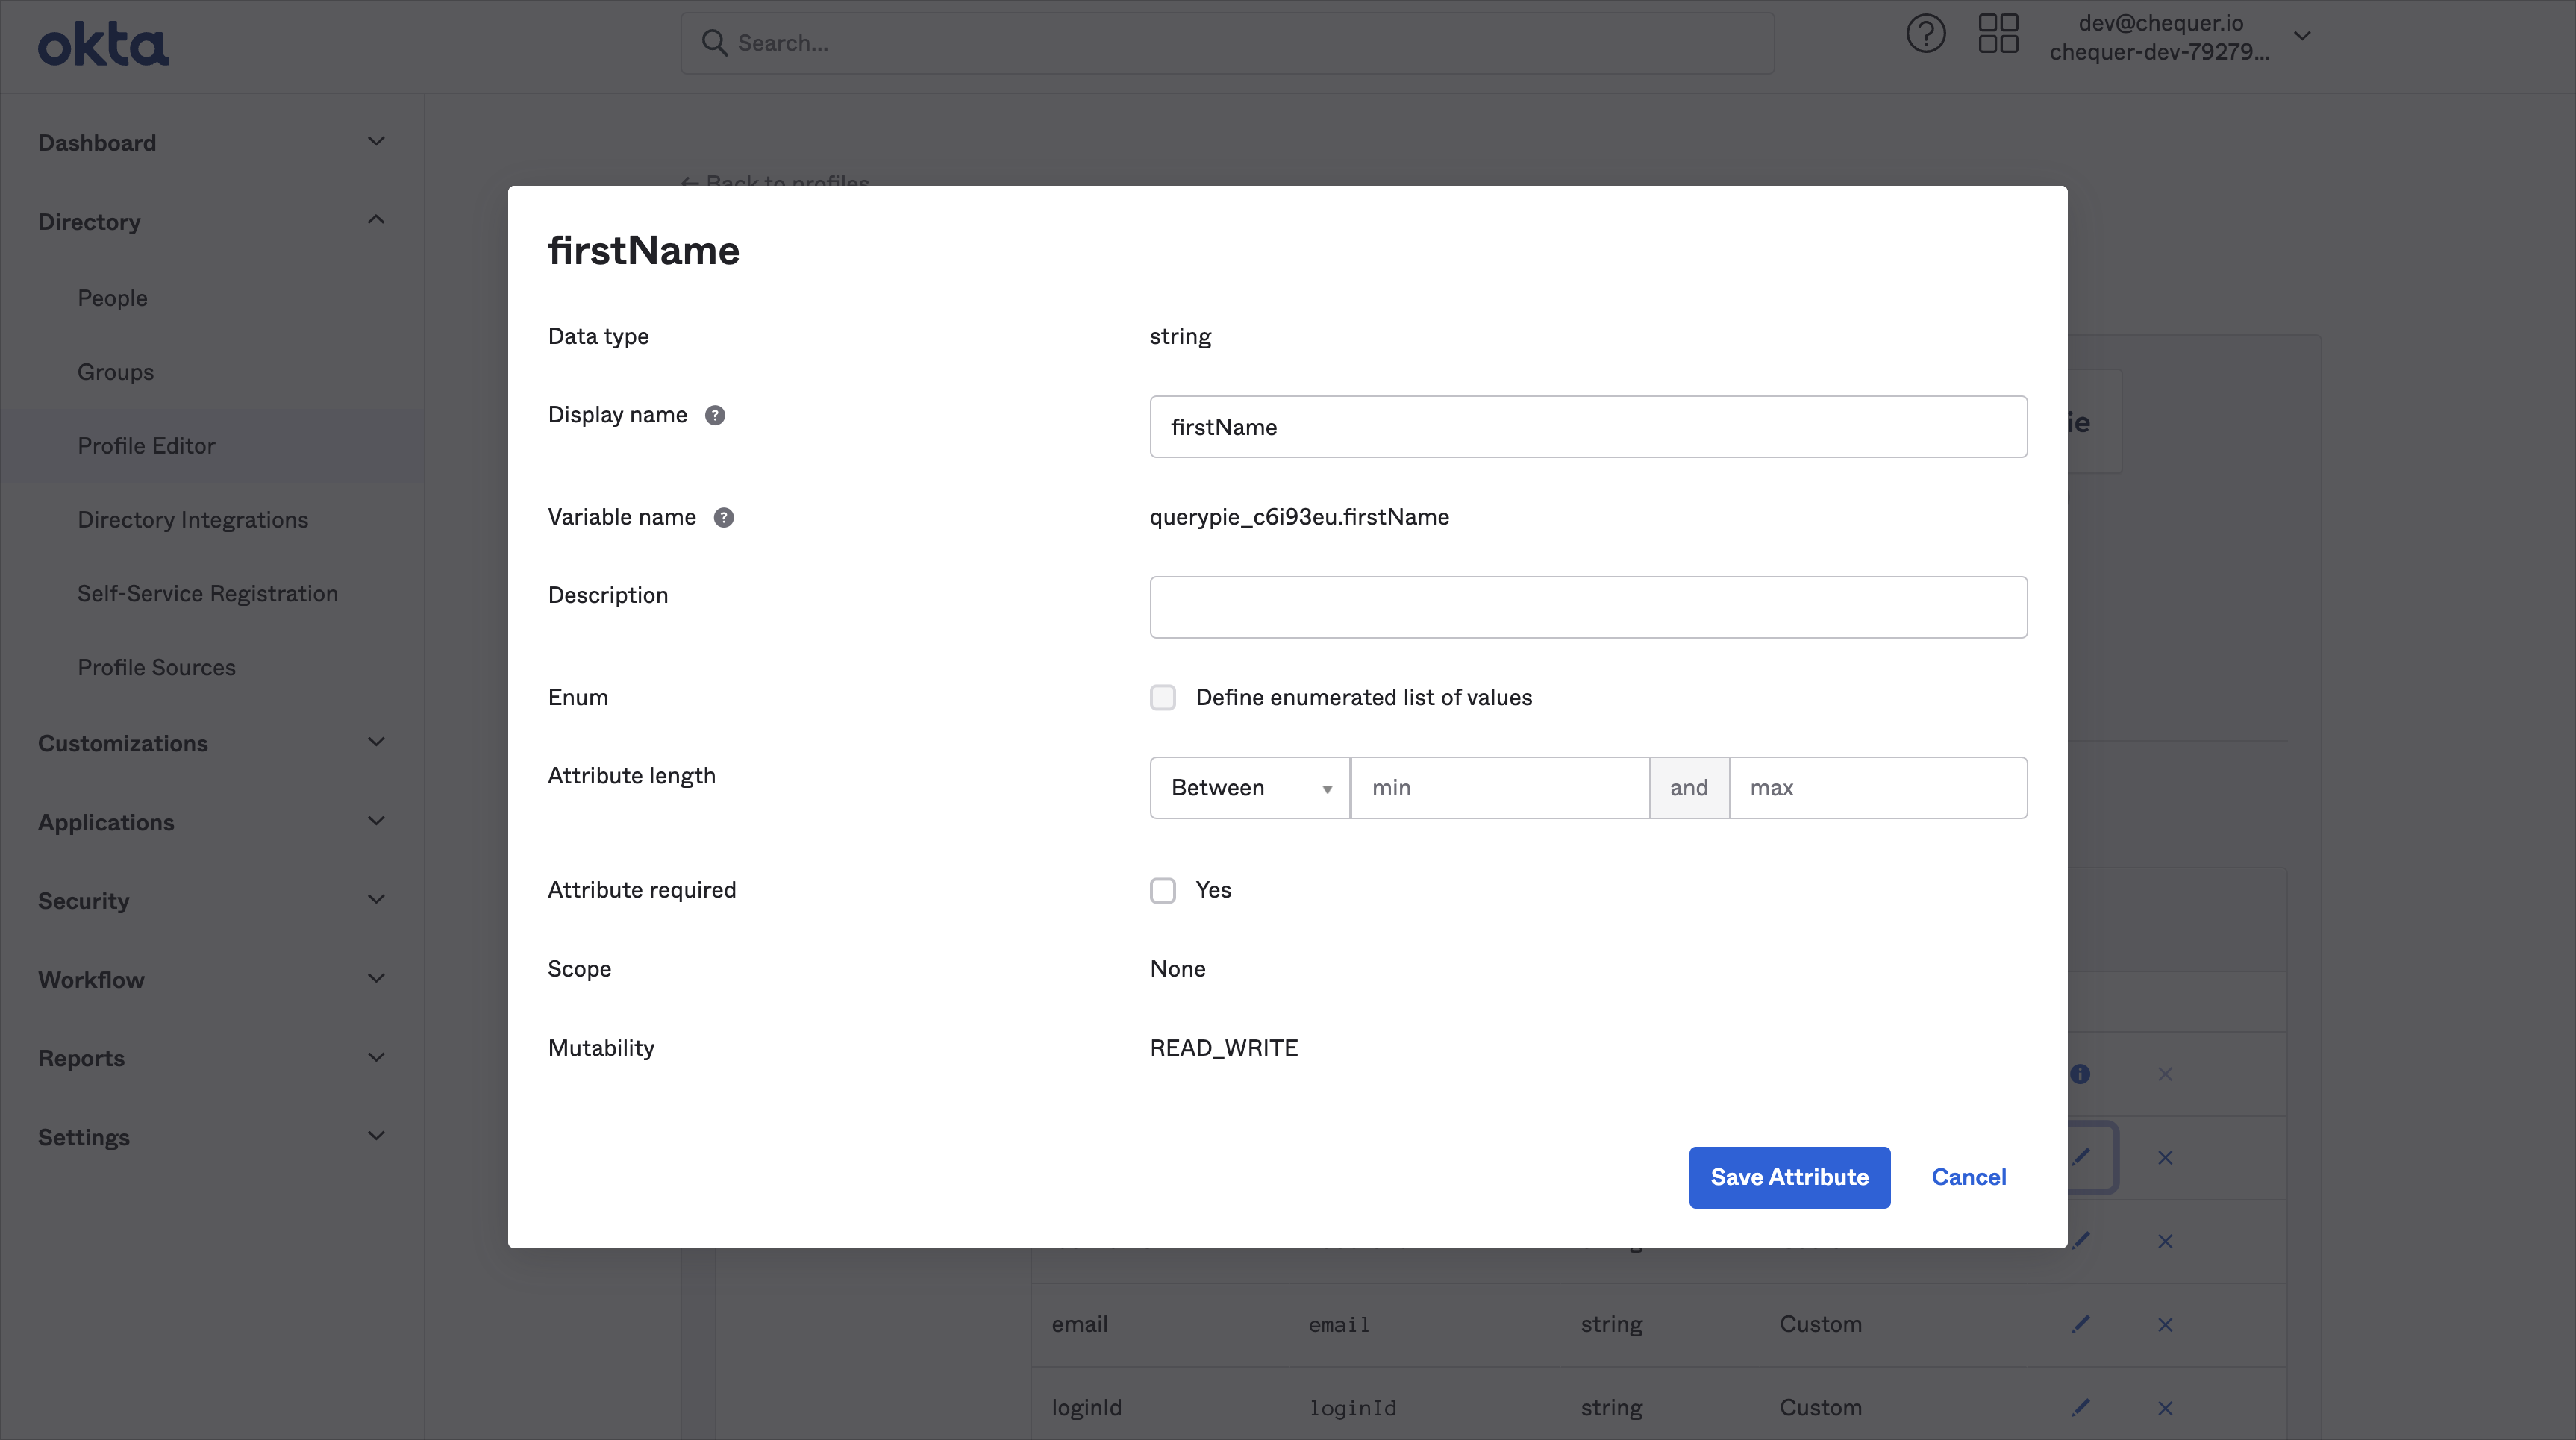
In the left pane of the Okta admin console, navigate to Directory > Profile Editor.
Select 'QueryPie User' from the list of profiles.
In the Attributes settings, click the
Add Attributebutton.On the Add Attribute screen, enter the following items in order, then save:
Display name : firstName / Variable name : firstName
Save and Add AnotherDisplay name : lastName / Variable name : lastName
Save and Add AnotherDisplay name : email / Variable name : email
Save and Add AnotherDisplay name : loginId / Variable name : loginId
Save
Okta Admin Console > Directory > Profile Editor
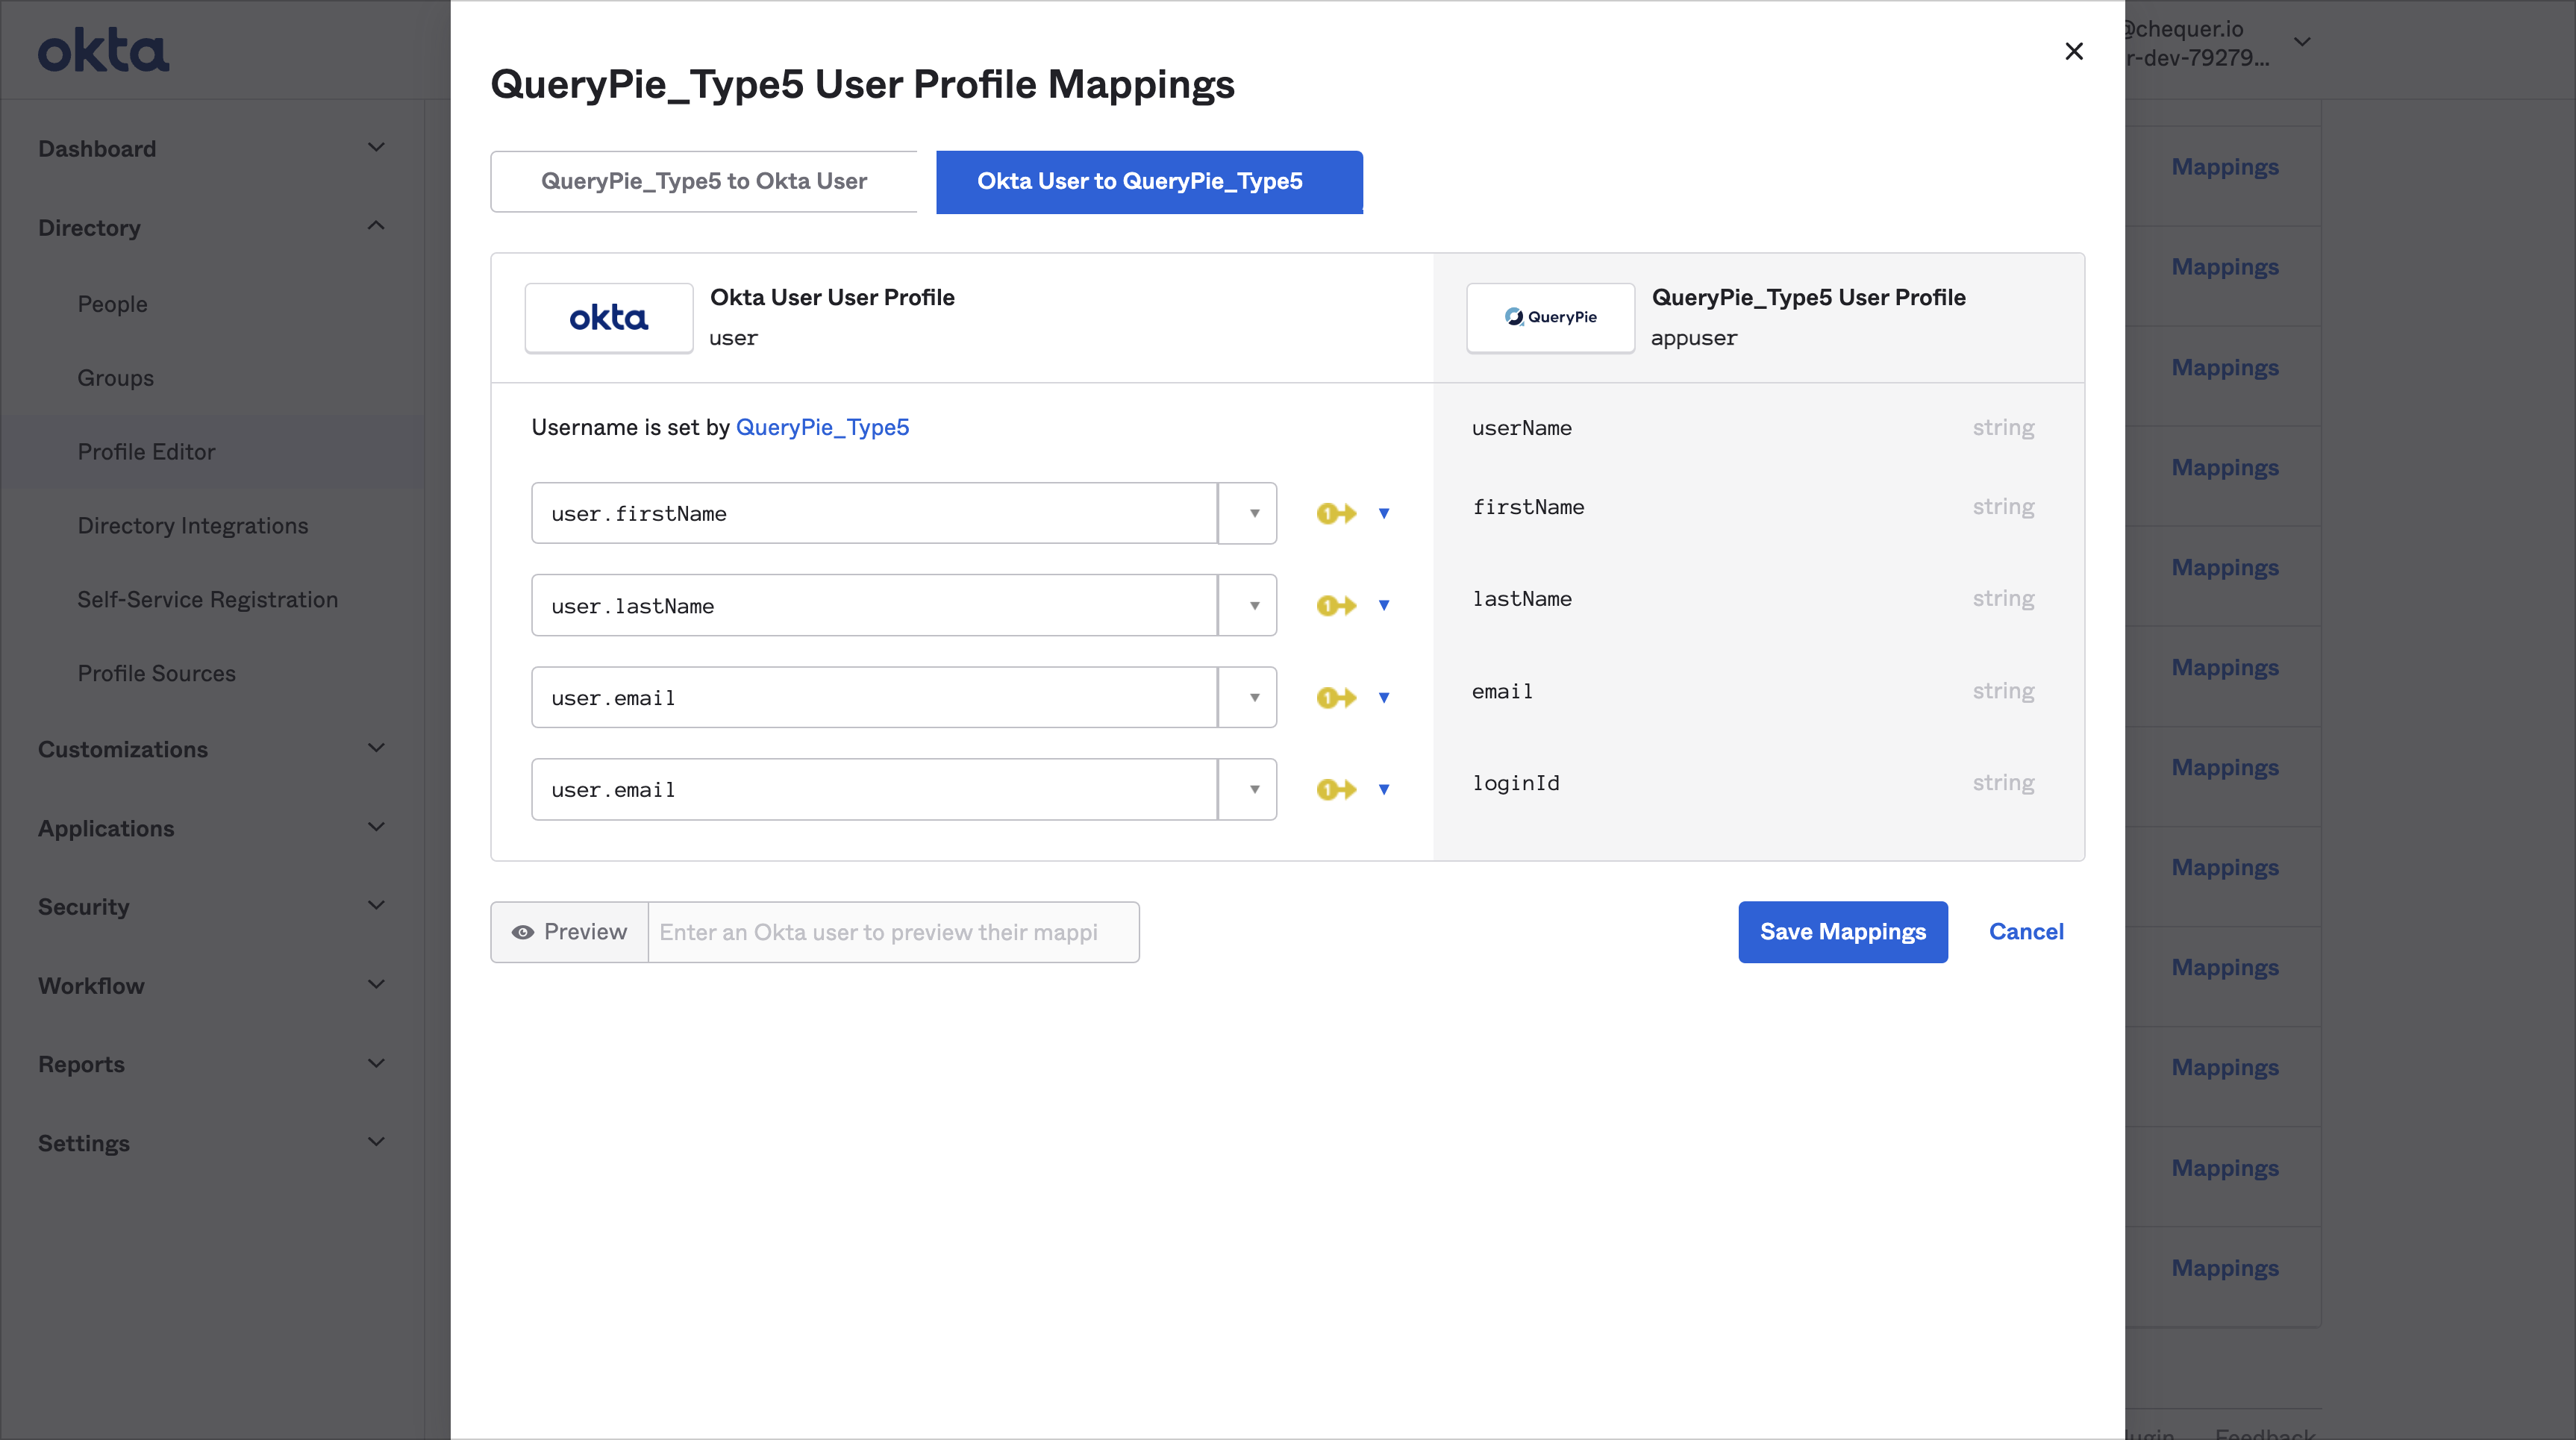
Confirm that the four attributes have been added and click the
Mappingsbutton.Associate the Okta User Profile Attribute entry with the Attribute in your QueryPie User Profile as shown below:
user.firstName ↔︎ firstName
user.lastName ↔︎ lastName
user.email ↔︎ email
user.email ↔︎ loginId (Use Okta's email entry as QueryPie's Login Id.)
Save Mappings.
Assign Users to QueryPie Applications
Okta Admin Console > Applications > Applications > QueryPie App
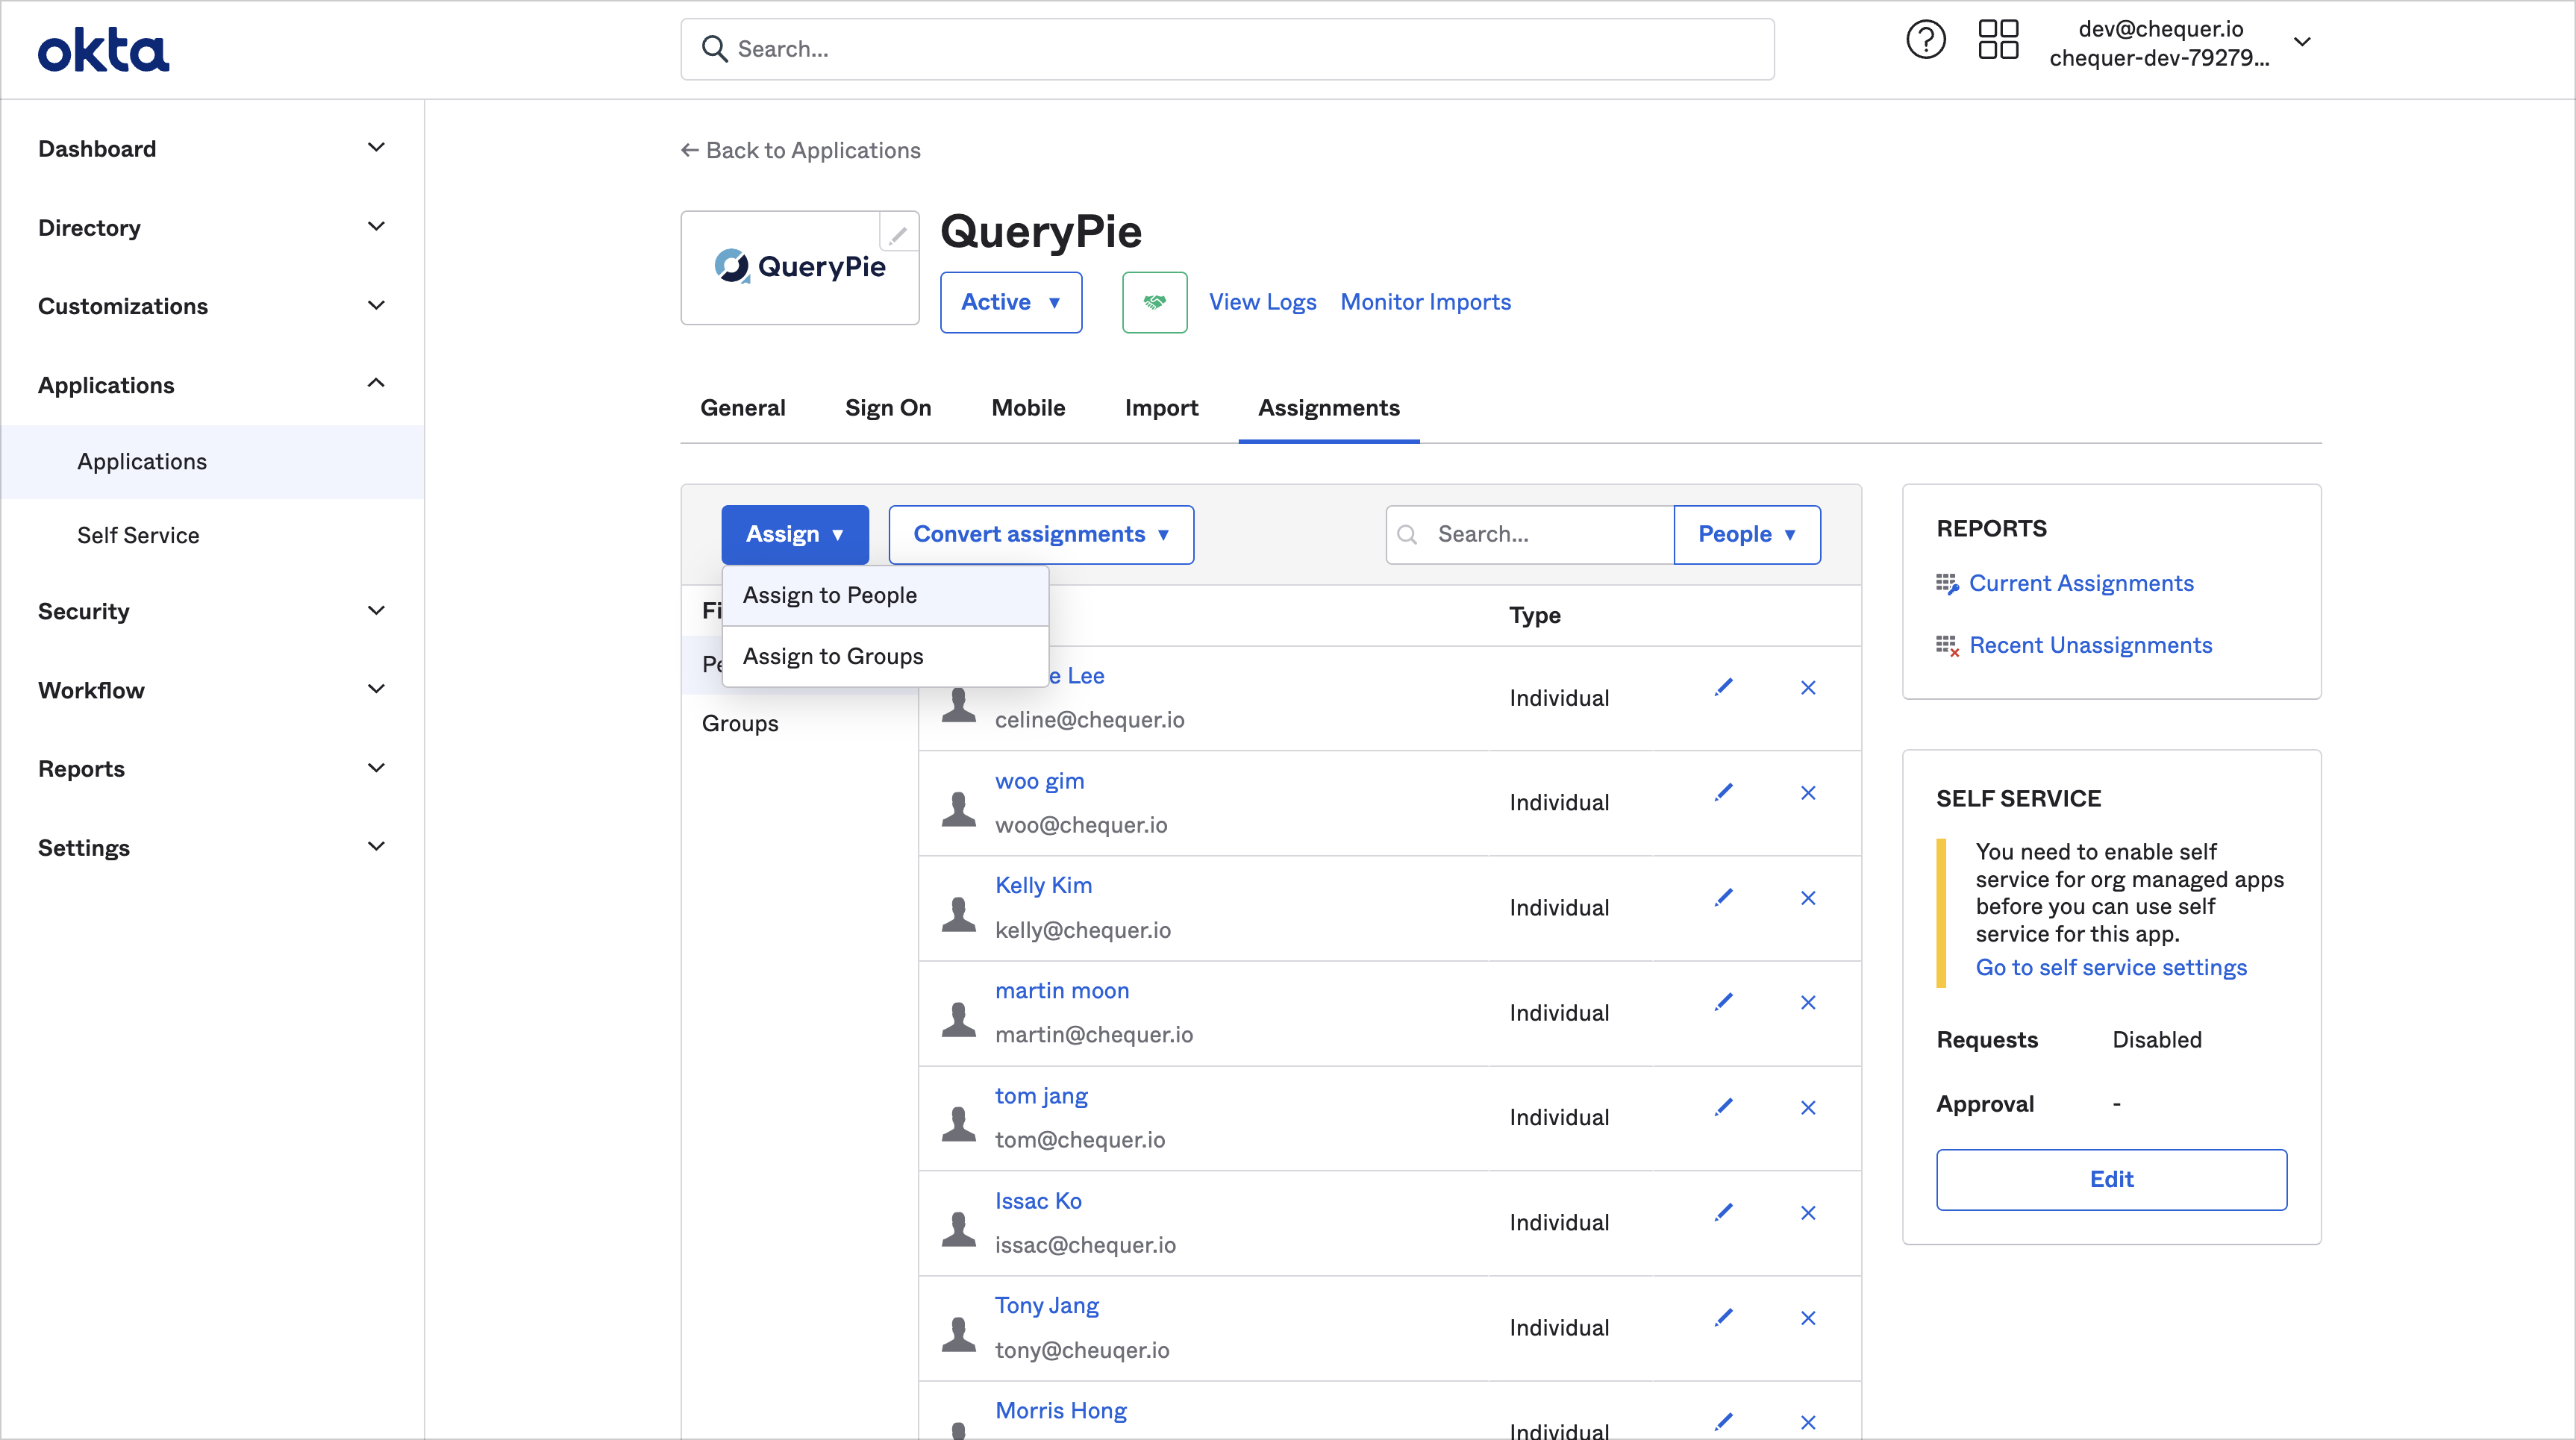
On the Okta admin console, navigate to Applications > Applications menu.
Select the QueryPie application from the list.
Go to the Assignments tab and click the
Assignbutton to select eitherAssign to PeopleorAssign to Group.Assign the users or groups you want to allow access to QueryPie using their Okta accounts, and then click the
Donebutton.When assigning People, verify the user information and click the
Save and Go Backbutton.When assigning the Group, leave the loginId field blank and click the
Save and Go Backbutton.
You can view the history of users or groups that have been assigned to and added to your QueryPie application.
Set Up QueryPie Application Integration Information in Okta

Okta Admin Console > Applications > Applications > QueryPie App
On the QueryPie application page within Okta, navigate to the Sign On tab.
In the Settings area, click the
Editbutton to enter the domain address where QueryPie is installed in the Base URL field, then save it.In the SAML Signing Certificates area, click the
Generate new certificatebutton to generate one. (or use the existing certificate by clickingActions > View IdP metadata)In the Actions section, click
View IdP Metadata, then copy the XML information that appears in the new window.
Issue Okta API Tokens with Minimal Permissions
To synchronize users, groups, and group memberships between QueryPie and Okta, you need to issue an Okta Admin API token. Typically, this involves issuing and applying an API token to your Okta Super Administrator/Read-Only Administrator account. Here's a general method to do so:
Access the Okta admin console after logging in with your Okta Super Administrator or Okta Read-Only Administrator account.
Navigate to the Security > API menu.
Within the API menu, go to the Tokens tab.
Click on the
Create Tokenbutton to generate a new API token.
If you need to adjust your Okta API token to grant minimal permissions to improve security, we recommend creating an API token with the following permissions and methods:
Okta Admin Console > Security > Administrators > Roles > Create new role
Navigate to the Directory > People menu and click on
Add Personto create an account for dedicated system integration.If you already have an account enabled for QueryPie integration, skip this step.
Navigate to the Security > Administrators menu and go to the Roles tab.
Select
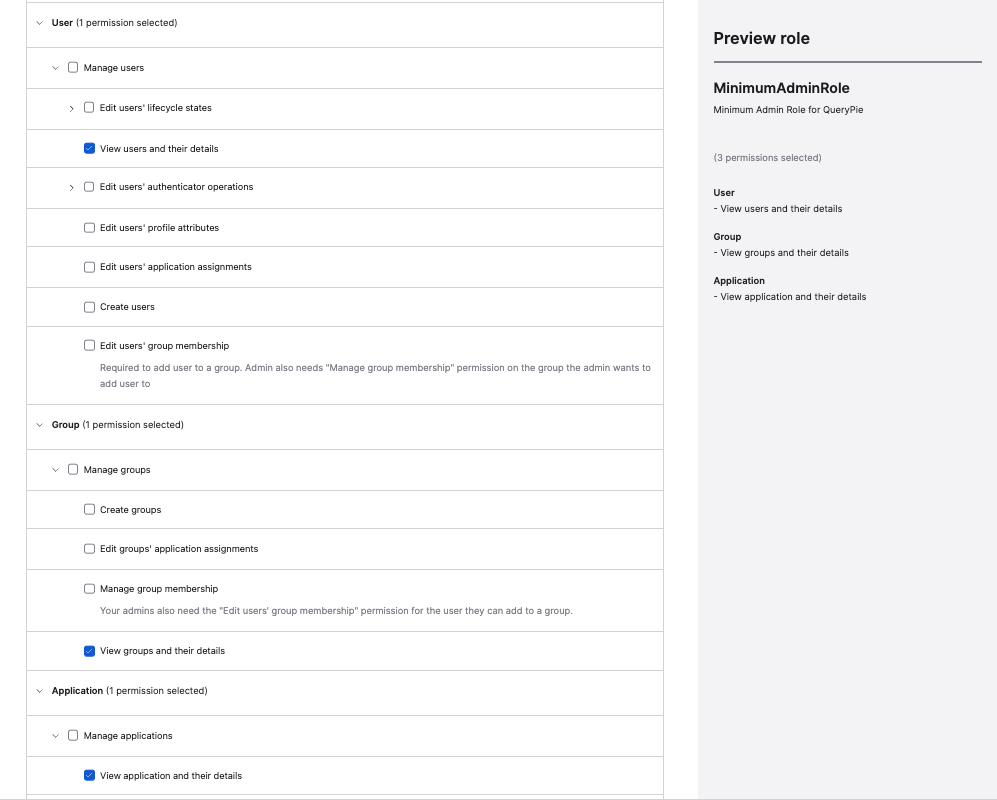
Create new role.Define a role name (e.g. MinimumAdminRole) and role description. In Select Permissions, check only the following permissions:
User
View users and their details
Group
View groups and their details
Application
View application and their details
Click
Save roleto save the custom role.Go to the Resources tab.
Select
Create new resource set.If you already have a resource set created for scoping permissions, skip this step and proceed to step 9.
Define a Name (e.g. MinimumResources) and Description. Specify the following ranges and press
Create:User : Select all QueryPie users
Group : Select all QueryPie usage groups
Application : Limited to QueryPie apps
Go to the Admins tab and assign the following permissions to the account for the QueryPie integration:
Role: MinimumAdminRole | Resource: MinimumResources
Role: Read-Only Administrator
Temporarily grant API token for access to the Generate API Token menu
Authenticate and access the Okta Admin console with your QueryPie integration account.
In the Security > API menu, go to the Tokens tab.
Click the
Create Tokenbutton to generate an authentication token.Once the token is generated, go back to the admin account you initially worked with and edit the account for the integration on the Security > Administrators > Admins tab to regain Read-Only Administrator permissions.
Set Up Okta Integration and Synchronization in QueryPie
General Settings > User Management > Authentication
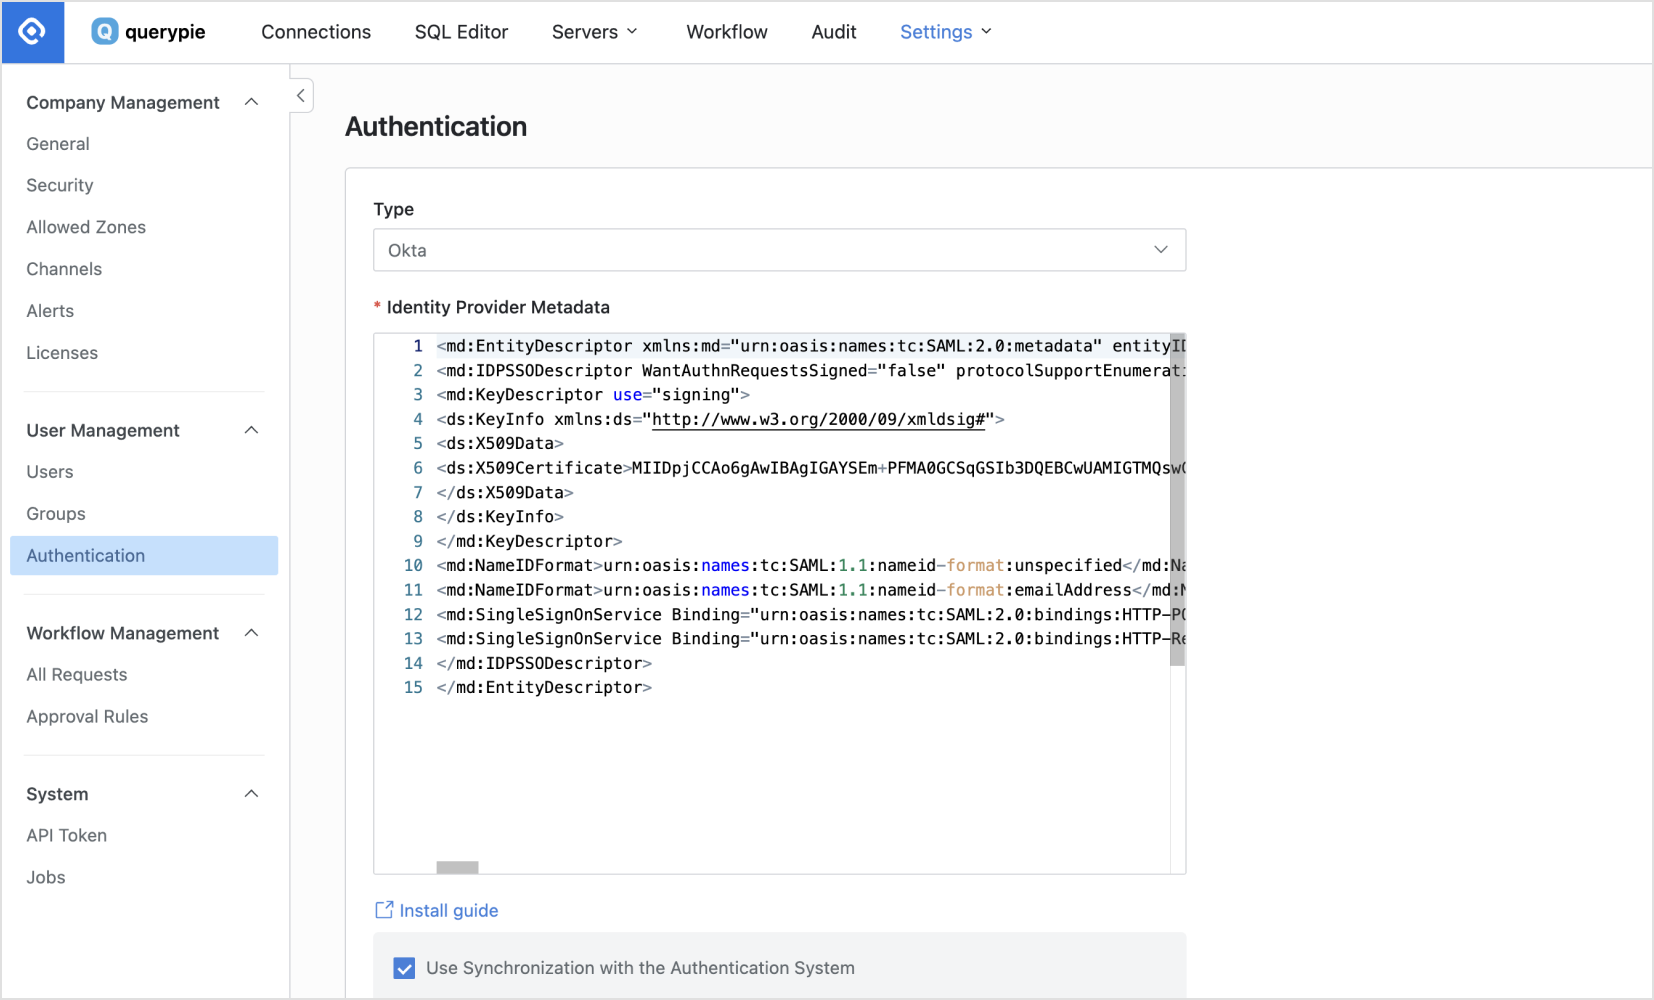
In QueryPie, navigate to the General Settings > User Management > Authentication menu.
In the Authentication Type field, select Okta.
Paste the copied XML information into the Identity Provider Metadata field.
If you want to set up automatic synchronization, check
Use Synchronization with the Authentication System.API URL: The url can be found in the form {domain}.okta.com by clicking on your profile in the top right corner of the Okta admin page.
API Token: Enter the Okta Admin API token.
Application ID: Enter if you use more than one QueryPie app in Okta.
If you want to use the automatic synchronization feature, set
Schedulingin the Replication Frequency field.Save Changes.Click
Synchronizeto synchronize users in Okta with QueryPie.
How to Find Your Application ID
If you are using more than one QueryPie application, navigate to the Okta Admin Console > Applications and click your QueryPie app to view its details. In the URL of your browser’s address bar, you will find the Application ID as shown in the screenshot below.
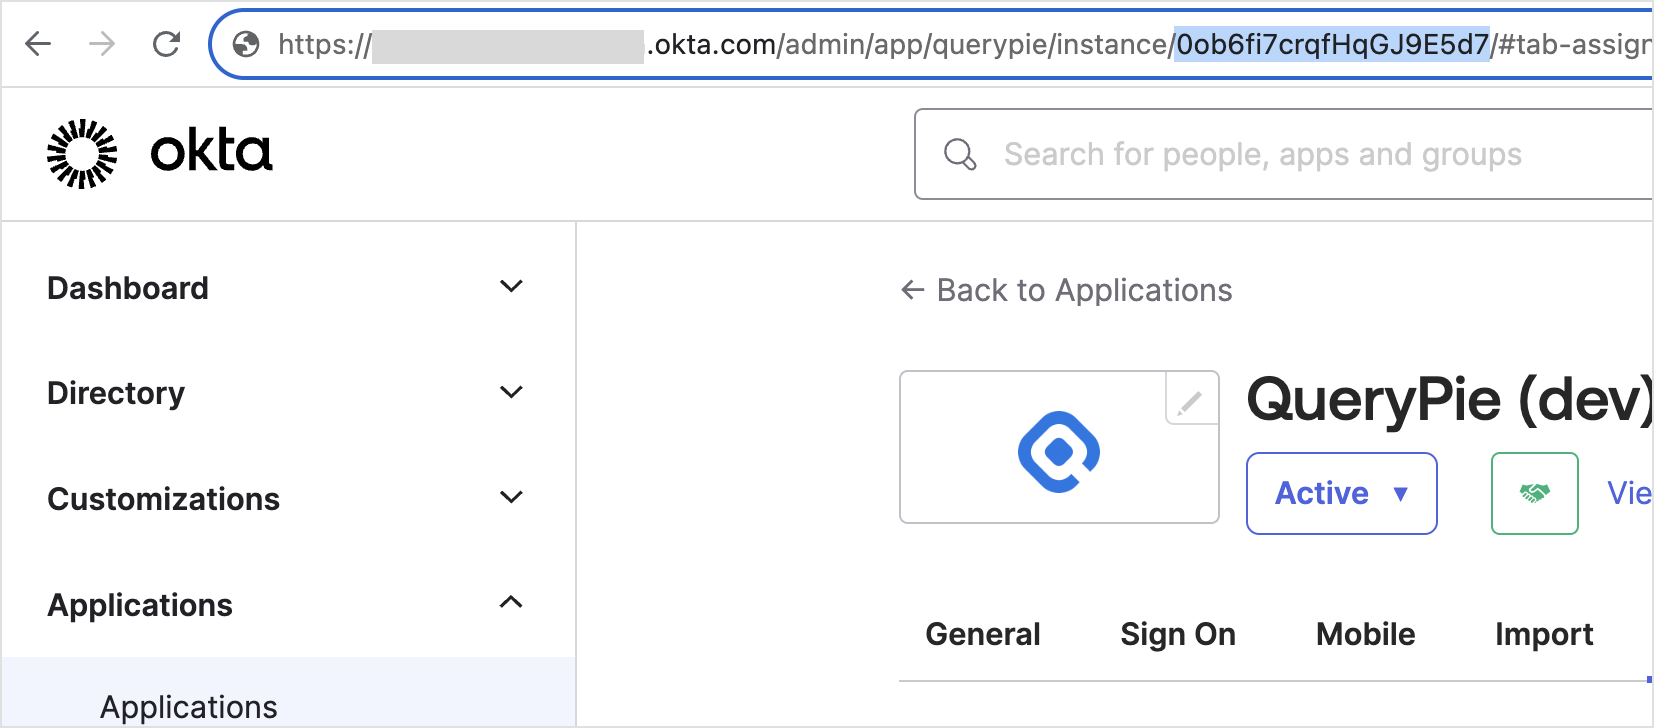
Okta Admin Console > Applications > QueryPie App URL
Sign In With Okta
You can view synchronized users and groups in the General Settings > Users or Groups menu.
You can now sign in to QueryPie with your Okta account via the
Login with Oktabutton on the login page.
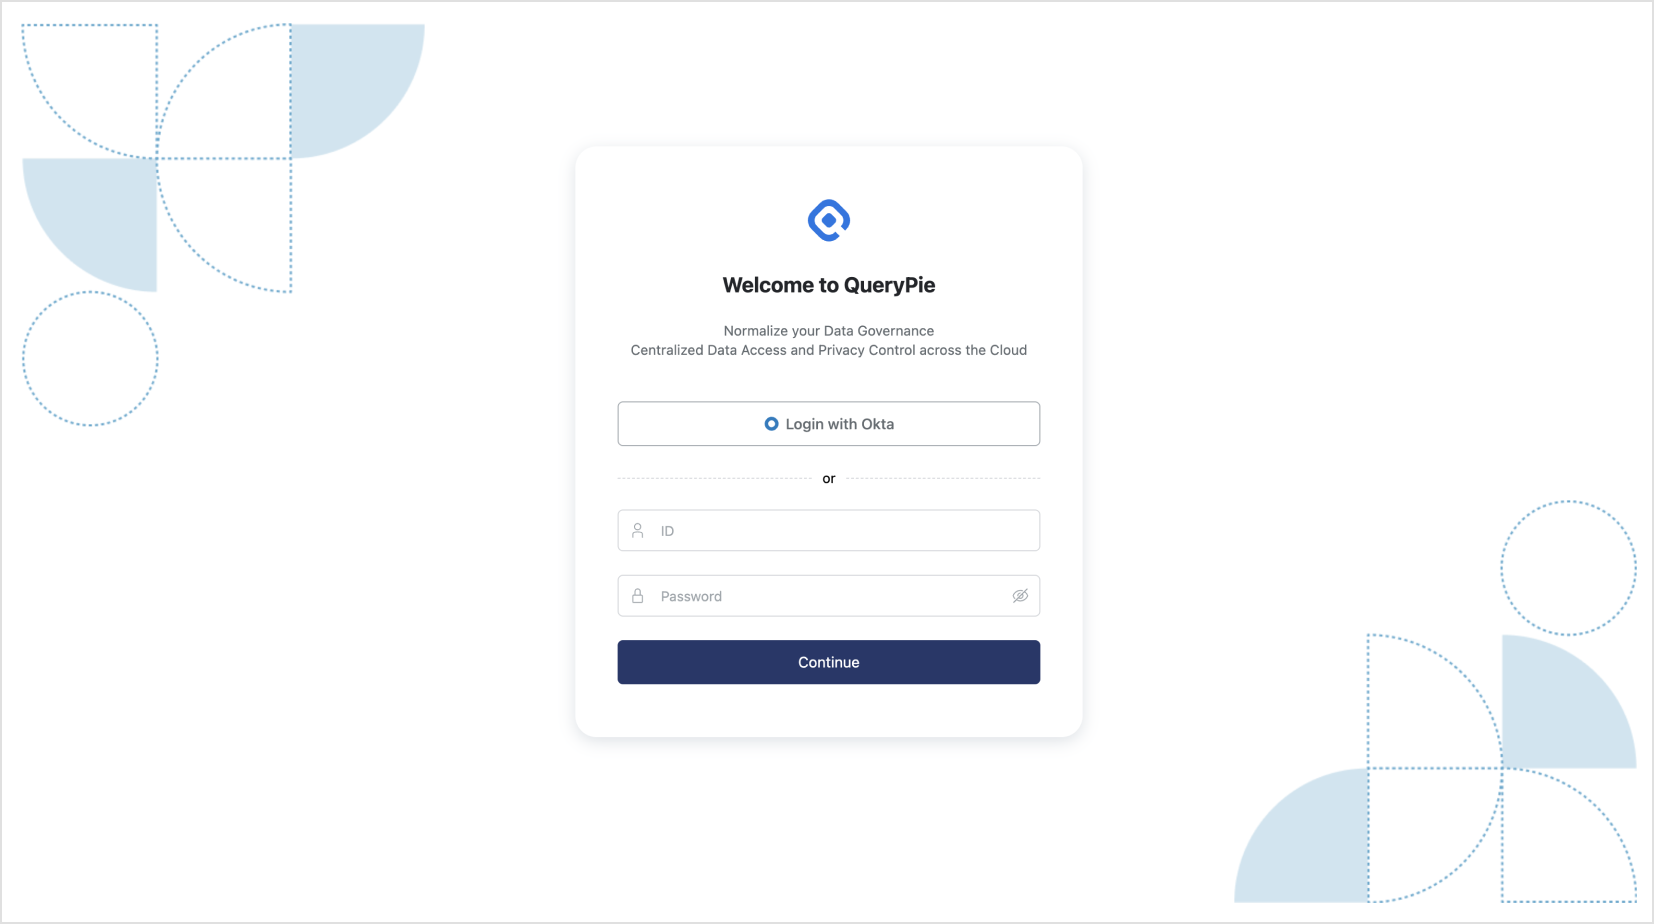
Users and groups support one-way synchronization from Okta to QueryPie. Synchronized users and groups cannot be modified or deleted within QueryPie.
Related Topics